The sharp roofline cutting through forest canopy. The cozy loft tucked under steeply pitched rafters. A-frame tiny houses have exploded in popularity among DIYers and downsizers looking to combine architectural drama with practical simplicity. These triangular structures aren’t just Instagram bait, they’re structurally efficient, relatively straightforward to frame, and surprisingly adaptable to different climates and building codes. Whether you’re planning a weekend getaway, full-time dwelling, or rental property, understanding the realities of a frame tiny home construction will save you time, money, and headaches.
Table of Contents
ToggleKey Takeaways
- A-frame tiny houses combine stunning architectural design with structural efficiency, distributing roof loads through angled walls that eliminate the need for interior load-bearing walls and simplify the framing process.
- A 50-55 degree rafter pitch represents the sweet spot for A-frame tiny home design, balancing usable loft space, snow shedding capability, and material costs.
- DIY A-frame builds from scratch cost 30-40% less than prefab kits and take 3-4 months for weathered-in shells with prior framing experience, while total project costs range from $30,000-$60,000 depending on finishes and site conditions.
- Strategic interior layouts maximize vertical space through lofted sleeping areas with at least 36 inches of headroom, ship’s ladder stairs with built-in storage, and kitchens positioned along angled walls to embrace the narrowing geometry.
- Zoning and permits apply to A-frame tiny houses—most jurisdictions classify structures over 200 square feet as full dwellings requiring engineered plans, while classification as an ADU or recreational cabin may offer more lenient regulations.
- A mini-split heat pump system rated 9,000-12,000 BTU efficiently handles climate control in compact A-frame spaces while built-in storage solutions and strategic window placement create functional, livable tiny homes that don’t feel cramped.
What Makes A-Frame Tiny Houses So Appealing?
The triangular profile isn’t just aesthetically striking, it’s structurally sound. The A-frame design distributes roof loads directly down to the foundation through the angled walls, which act as both wall and roof. This eliminates the need for interior load-bearing walls in many designs, opening up floor plans and simplifying the framing process.
Snow slides off those steep pitches (typically 45-60 degrees) without accumulating dangerous weight, making A-frames ideal for mountain or northern climates. Rain sheds just as efficiently, reducing moisture intrusion risks that plague flat or low-slope roofs. The compact footprint, often 400-800 square feet, keeps material costs down while the dramatic ceiling height prevents that cramped feeling common in traditional tiny homes.
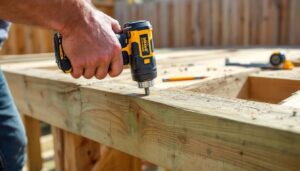
From a DIY perspective, the repetitive rafter pattern means fewer custom cuts once you’ve dialed in your angles. The triangular geometry is inherently rigid, so you’ll spend less time wrestling with temporary bracing during framing. And because the design has been around since the 1950s, building inspectors are generally familiar with the structural principles, which can smooth the permitting process.
The inside a frame tiny house layout forces creative thinking about vertical space, which often leads to better design decisions than simply shrinking a conventional floor plan. Sleeping lofts, integrated storage under stairs, and multipurpose furniture become necessities rather than afterthoughts.
Design Considerations for Your A-Frame Tiny House
Start with your rafter angle. A 60-degree pitch maximizes usable loft space and provides excellent snow shedding, but requires longer lumber and more material. A 45-degree angle reduces material costs but cuts into headroom on upper levels. Most builders find 50-55 degrees hits the sweet spot for a tiny home a frame design.
Foundation choice depends on your site and local codes. A concrete slab works well for flat, stable ground and simplifies floor framing. Pier and beam foundations suit sloped lots and areas with frost heave concerns, use concrete sonotubes or helical piers spaced no more than 8 feet apart, sized for your soil bearing capacity (consult a local engineer if you’re unsure). Skids made from pressure-treated 6×6 or larger timbers keep the structure mobile for code purposes in some jurisdictions, though you’ll need to verify trailer regulations.
Window placement requires planning. Those angled walls limit where you can install standard rectangular windows. Gable-end glazing is the easiest approach, large windows or glass doors on the triangular front and back faces provide light and views without custom fabrication. If you want side windows, you’ll need trapezoid or triangular units (expensive and often custom) or build vertical doghouse dormers into the roofline, which adds complexity but dramatically improves usability.
Insulation strategy differs from conventional homes. The roof/wall assembly is continuous, so use closed-cell spray foam (R-6 to R-7 per inch) or rigid foam board between rafters with sealed seams. Fiberglass batts can work but require meticulous air sealing to prevent moisture problems in those hard-to-reach peak areas. Budget R-30 minimum for cold climates, R-20 for temperate zones.
Maximizing Vertical Space
A sleeping loft is almost mandatory in an a frame tiny home, but don’t just slap a platform at the peak. Position the loft floor at a height where you have at least 36 inches of headroom at the ridgeline for sitting up in bed, typically 8-10 feet above the main floor, depending on your pitch.
Install the loft joists perpendicular to the rafters, hanging them from Simpson LUS joist hangers or similar hardware rated for your load. Use 2×6 or 2×8 joists on 16-inch centers for a sleeping loft (30 psf live load minimum per IRC). If you’re planning storage above, bump to 2x8s or 2x10s and verify with your local code.
Stairs eat up valuable floor space, but ladders get old fast for daily use. A ship’s ladder (steeper than standard, around 60-degree angle) with alternating treads saves space while remaining climbable. Build storage drawers into the risers, each step becomes a pull-out box. The area under the stairs should house your water heater, electrical panel, or built-in shelving.
The main floor layout should embrace the narrowing walls. Place your kitchen along one angled wall with upper cabinets that follow the roofline, you’ll lose some cabinet depth on one side, but gain a visually interesting space. A galley kitchen running parallel to the ridge makes efficient use of the narrowest dimension. Keep your bathroom under the loft where headroom is already limited, freeing the peak for living and dining areas where that dramatic ceiling height creates small space living ideas that actually feel spacious.
Building an A-Frame Tiny House: DIY vs. Prefab Kits
If you’ve got framing experience and access to a table saw or miter saw, building from scratch gives you complete control and typically costs 30-40% less than kits. You’ll need to cut repetitive rafter pairs, figure on 12-16 pairs for a 20-foot-long structure at 16-inch on center spacing. A speed square and construction calculator will be your best friends for calculating ridge cuts and bird’s mouths.
The critical connection is where rafters meet the ridge board. Use a 1-1/2-inch ridge board (actual dimension, not nominal, that’s a 2×8 or 2×10 depending on rafter size) and fasten each rafter with three 16d nails or structural screws. At the base, the rafter tails either sit on a top plate (conventional foundation) or bolt directly to a floor rim joist. Install hurricane ties or rafter clips at every connection, wind uplift is real, even on heavy structures.
Prefab A-frame kits range from $15,000 for shell-only packages to $60,000+ for complete turnkey systems. Avrame, Den, and DEN Outdoors offer popular models. Kits include pre-cut framing members, detailed plans, and sometimes even SIPs (structural insulated panels) that combine framing and insulation. The trade-off: you’re locked into their dimensions and design features, and shipping costs for a full kit can add $3,000-$8,000 depending on your location.
A middle-ground option is buying plans from an architect or online marketplace (expect $500-$2,000 for stamped, code-compliant plans) and sourcing materials yourself. This gets you professional engineering without the kit markup. Look for plans that specify connection details and provide a material takeoff list, generic sketches without these details will cost you time and money at the lumber yard.
Realistic DIY timeline for a capable builder with weekend/evening work: 3-4 months for a weathered-in shell, another 2-3 months for interior finishing. Full-time work can cut that in half. If you’re new to framing, add 50% to those estimates and budget for mistakes.
Cost Breakdown: What You’ll Actually Spend
For a 400-square-foot A-frame tiny house built from scratch in 2026, expect these ranges:
Foundation: $2,000-$5,000 (pier and beam) to $8,000-$12,000 (full slab). Helical piers in difficult soil can push higher.
Framing and sheathing: $8,000-$15,000 including dimensional lumber (2×6 or 2×8 rafters, 2×4 floor joists), OSB or plywood sheathing (7/16-inch for walls, 5/8-inch for roof), and structural hardware. Lumber prices fluctuate, get quotes from multiple yards.
Roofing: $2,500-$5,000 for architectural shingles (25-30 year warranty), more for metal roofing ($4,000-$7,000) which is worth considering for the longevity and modern look that suits many modern architecture projects.
Windows and doors: $3,000-$8,000. Large gable-end glass gets expensive fast. Budget $800-$1,500 per standard window, $1,200-$3,000 for quality entry doors.
Insulation and drywall: $3,000-$6,000. Spray foam costs more upfront ($1.50-$3.00 per square foot installed) but pays off in difficult-to-insulate A-frame geometry.
Electrical and plumbing: $4,000-$8,000 if you’re hiring out. DIYers with basic skills can handle rough-in work, but hire a licensed electrician for the panel and final connections, it’s code in most jurisdictions and affects insurance.
Finishes: $5,000-$15,000+ depending on choices. Luxury vinyl plank flooring runs $2-$4 per square foot installed. Kitchen and bath fixtures range from budget ($2,000 total) to mid-range ($8,000+).
Total DIY build: $30,000-$60,000 for a modest but functional tiny home a frame structure. Going with a prefab kit shifts the range to $45,000-$85,000 including site prep and finish work.
These figures assume you or a helper provide the labor. Hiring contractors for everything can double the total cost. Regional variations are significant, West Coast and Northeast builds run 20-40% higher than Midwest or South.
Zoning, Permits, and Property Considerations
An A-frame doesn’t exempt you from local building codes. Most jurisdictions classify structures over 200 square feet with permanent foundations as dwellings requiring full permits. Expect to submit engineered plans showing structural calculations, foundation details, and compliance with energy codes.
Minimum square footage requirements remain a hurdle. Some counties mandate 600-1,000 square feet for primary dwellings. Classify your build as a recreational cabin or accessory dwelling unit (ADU) if allowed, regulations are often more lenient. If you’re building on wheels to dodge codes, verify local definitions: many areas now define a dwelling by use rather than foundation type.
Setback requirements (minimum distance from property lines) vary widely. Typical minimums are 10-25 feet from side and rear lines, 25-50 feet from front. The steep roofline can help with height restrictions, your peak might reach 24 feet, but if the code measures to the midpoint of the roof, you might squeak under a 15-foot limit.
Utility connections add cost and complexity. If municipal water and sewer aren’t available, budget $3,000-$8,000 for a well, $8,000-$20,000 for a septic system (perc test required). Off-grid solar systems that actually work year-round start around $15,000-$25,000 for a tiny home’s modest loads.
Property access matters more than you’d think. Can you get a concrete truck to your site? Can lumber deliveries navigate your road? A challenging site that resembles A-Frame Among the Pines might require a smaller mixer or hand-carrying materials, which inflates labor costs significantly.
Homeowners insurance can be tricky for tiny homes. Some insurers treat them as RVs (requiring specialized policies), others as standard dwellings. Shop around, rates and coverage vary wildly. Mention the permanent foundation and code-compliant construction to get better terms.
Interior Layout Ideas That Actually Work
The main floor should serve multiple functions without feeling cluttered. A Murphy bed or fold-down wall bunk in the main living area provides guest sleeping without permanently dedicating space. When raised, it disappears behind cabinet doors or becomes a desk surface.
Kitchens in A-frames benefit from vertical storage. Install cabinets that run all the way to the angled ceiling, the top shelves store rarely used items. A single basin sink (18-24 inches) with a pull-down faucet saves counter space compared to double basins. Induction cooktops avoid venting complications and reduce fire risk in tight quarters.
Bathrooms need at least 30 inches of clear floor space in front of toilets and sinks per code. A corner shower (36×36 inches minimum) fits better than tub surrounds in tight A-frame floor plans. Pocket doors save swing space, budget $200-$400 for quality hardware that won’t jam after six months.
Lighting strategy: install LED can lights in the loft ceiling aimed down into the main space, this avoids cluttering the dramatic peak with fixtures. Add under-cabinet lighting in the kitchen and sconces flanking the bed area. Windows on both gable ends enable cross-ventilation, critical in a compact space with limited mechanical systems.
Built-ins make or break tiny home livability. Design window seats with storage under gable glazing, they’re cozy reading nooks that hide seasonal gear. Frame a bench with cubbies near the entry for shoes and coats. Every vertical surface should work: install magnetic knife strips, pegboard tool walls, and hanging pot racks to keep counters clear.
Climate control in a tiny a frame home is easier than you’d think. A mini-split heat pump (9,000-12,000 BTU) handles heating and cooling efficiently. Mount the indoor head unit on a gable-end wall where it can push air the length of the space. Ceiling fans at both the loft and main floor improve air circulation. If you’re off-grid, a small wood stove (rated for tiny spaces, with proper clearances and a chimney that penetrates the ridge) provides reliable heat and ambiance without draining batteries.